This is the second part of a three part series about making the Twitter bot @BotfonsNeedles. Click here for Part I.
In this part, I’ll explain how to use the Twitter API to
- post the images to Twitter via the Python library Tweepy, and
- keep track of all of the Tweets to get an increasingly accurate estimate of 𝜋.
In the next part, I’ll explain how to
- Package all of this code up into a Docker container
- Push the Docker image to Amazon Web Services (AWS)
- Set up a function on AWS Lambda to run the code on a timer
Get access to the Twitter API
When I made my first Twitter bot, I followed the article “How to Make a Twitter Bot With Python“.
In order to have your Python code post to your Twitter feed, you’ll need to register for a Twitter developer account, which you can do by going to https://developer.twitter.com/ and clicking apply. You’ll need to link the account to a phone number and fill out a few minutes of forms. For all four of my bots, (@oeisTriangles, @xorTriangles, @RobotWalks, and this bot) I’ve been approved right away.
Keep in mind that you can only use your phone number on two Twitter accounts—so you’ll have to use a Google Voice number or something else if you want to make more than two bots.
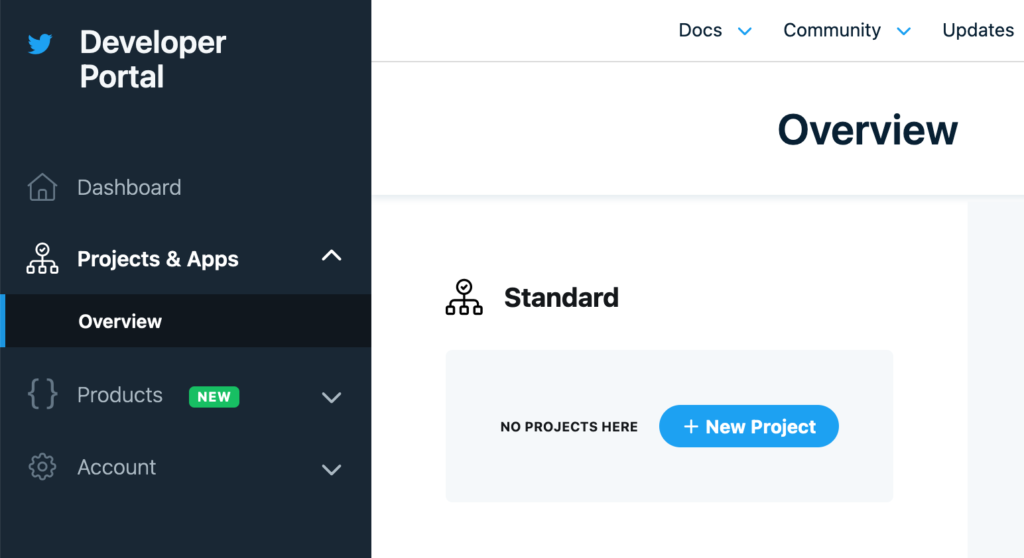
Once you’re approved, go to the Developer Portal, click on the Projects & Apps Overview, and click on the blue “+ New Project” button. You will be given a series of short questions, but what you submit isn’t too important.
Getting the API Keys
Once you’ve filled out the form, you should be sent to a page with an API Key and API Secret Key. This is essentially the password to your account, so don’t share these values.
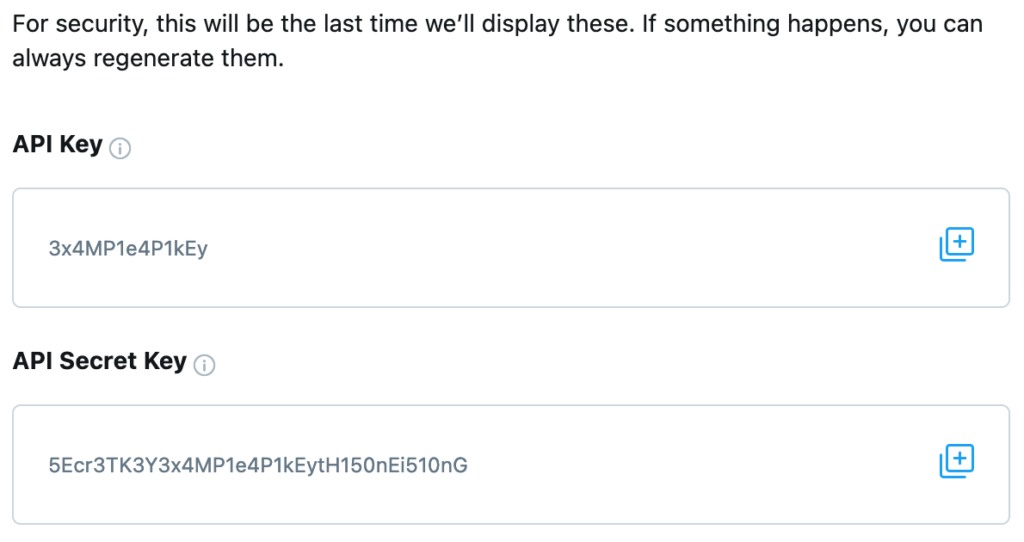
We’re going to take these values and place them in a new file called secrets.py, which will look like this:
API_KEY        = "3x4MP1e4P1kEy"
API_SECRET_KEY = "5Ecr3TK3Y3x4MP1e4P1kEytH150nEi510nG"
Getting the Access Token
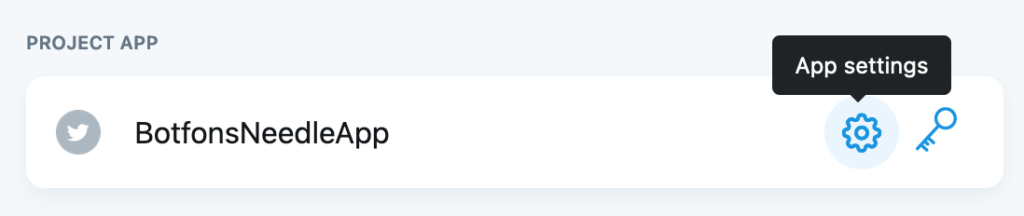
Once we close the API Key dialog, we’ll need to update our app to allow us to both read and write. We can do this by clicking on the gear to access our projects “App settings”.
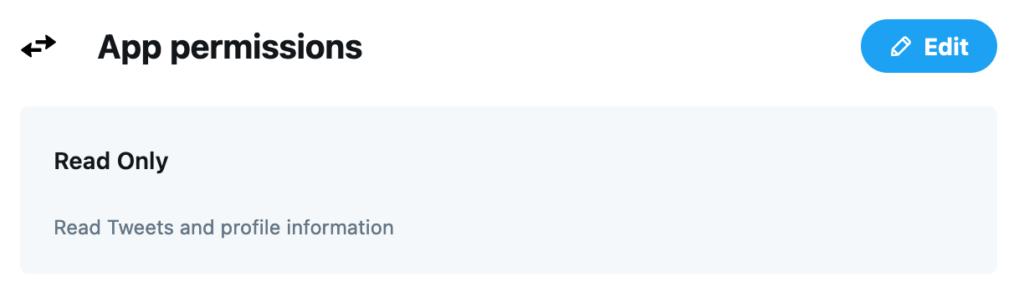
Once you’re in, you’ll want to edit the App permissions to “Read and Write”.
Then go to the “Keys and Tokens” page (which you can do by clicking the key icon from the app settings page), and generate an Access Token and Secret.

When you click “Generate” you should get an Access Token and a Access Token Secret, which you need to add to your secrets.py file.
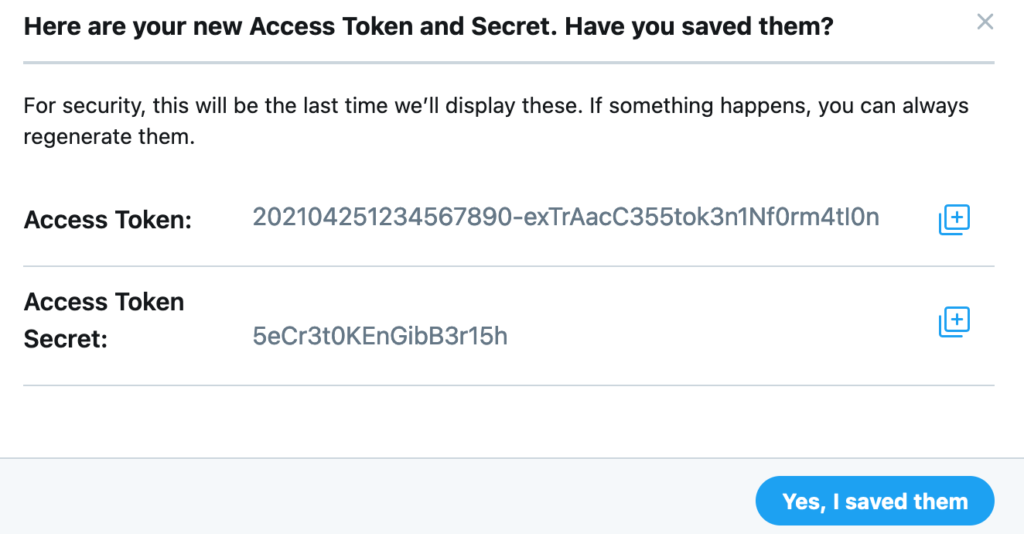
Thus your secrets.py file should contain four lines:
API_KEY             = "3x4MP1e4P1kEy"
API_SECRET_KEY      = "5Ecr3TK3Y3x4MP1e4P1kEytH150nEi510nG"
ACCESS_TOKEN        = "202104251234567890-exTrAacC3551Nf0"
ACCESS_TOKEN_SECRET = "5eCr3t0KEnGibB3r15h"
hello_twitter.py
Next, we’ll hook this up to the Twitter API via tweepy, which I’ll install in the terminal using pip:
$ pip3 install tweepy
And make a file called twitter_accessor.py that looks exactly like this:
from secrets import *
import tweepy

class TwitterAccessor:
  def __init__(self):
    auth = tweepy.OAuthHandler(API_KEY, API_SECRET_KEY)
    auth.set_access_token(ACCESS_TOKEN, ACCESS_TOKEN_SECRET)
    self.api = tweepy.API(auth)

  def read_last_tweet(self):
    timeline = self.api.user_timeline(count=1, exclude_replies=True, tweet_mode='extended')
    return timeline[0].full_text
Next, we’ll check that everything is working by making a file called hello_twitter.py:
from twitter_accessor import TwitterAccessor

new_status = "Hello Twitter!"
TwitterAccessor().api.update_status(new_status)
print("Posted status: '" + new_status + "'")
Run it via the command line:
$ python3 hello_twitter.py
If something looks broken, try to fix it. (If it’s broken because of something I’ve said, let me know.)
Reading and writing Tweets
Now you can delete your hello_twitter.py file, because we’re about to do this for real! In part 3, we’re going to wire this up to AWS Lambda, which has certain preferences for how we structure things. With this in mind, I’d recommend following my naming conventions, unless you have a reason not to.
Each Tweet should have copy that looks like this:
This trial dropped 100 needles, 59 of which crossed a line. This estimates π ≈ 2*(100/59) ≈ 3.38, an error of 7.90%.
In total, 374 of 600 needles have crossed a line.This estimates π ≈ 3.20, an error of 2.13%.
BotfonsNeedles should parse the “374 of 600”, throw 100 more needles, and report on the updated estimate of \(\pi\).
An implementation
I’ve made a file called tweet_builder.py, with five functions:
pi_digits_differencetakes an estimate of \(\pi\) and outputs an appropriate length string. For example, if the estimate is \(3.14192919\), then it will output"3.14192", which are all of the correct digits, plus the first two that are wrong. If the estimate is \(3.20523\), then it will output “3.20".error_estimatetakes an estimate of \(\pi\) and computes the right number of digits to show in its percent error. For example, if the estimate is \(3.20523\) (which is \(2.0256396\%\) too big) then it will output"2.02%".get_running_estimateuses the API inTwitterAccessorto look up the last tweet—then throws some needles, and outputs both the total number of needles tossed and the total number of needles that cross a line.tweet_copytakes the information fromget_running_estimate, formats it withpi_digits_distanceanderror_estimateand writes the text for the tweet.post_tweetuses the API inTwitterAccessorto send the tweet to Twitter, with an image to match.
Most of these implementations are just details which can be found on Github, but I want to highlight post_tweet, the function that is likely to be the most relevant to you.
def post_tweet(self):
  file_name = self.drawer.draw_image()
  copy = self.tweet_copy()
  self.accessor.api.update_with_media(filename=file_name, status=copy)
  return copy
What’s next
In Part III, we’ll get this running in a Docker container and have it run on AWS Lambda.
If you want to get a head start, make a file called app.py with a function called handler, which AWS Lambda will call. This function should return a string, which will get logged.
from tweet_builder import TweetBuilder

def handler(event, context):
  return TweetBuilder().post_tweet()
As usual, if you have any questions or ideas, there’s nothing I love more than collaborating. If you want help getting your bot off the ground, ask me about it on Twitter, @PeterKagey!
Leave a Reply